

There are many impressive accomplishments in Minecraft, too many to name in fact. Sprawling builds, complex machines, and massive servers are the hallmark of Minecraft and things keep getting bigger and better. No one doubts the epic scale Minecraft has reached, but every once in a while something grand comes along that sets a new benchmark in awesomeness. By far the most recent step in this long line of big ideas was an innovation pushed forward by YouTube user Kimundi2.
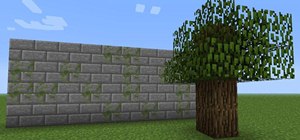
The premise of this innovation is simple: every block in the Minecraft symposium of block types will conduct redstone wire with the exception of glass. It's a simple game mechanic added on purpose by its developers, but what it has inspired is incredibly unexpected and creative.
Take a look at Kimundi2's video and you'll see what I mean. Using the relative conductivity of block types, Kimundi2 created an in-game transistor, a simple setup that can passively switch the flow of redstone current.
If the development of the Minecraft Transistor sounds insignificant, then you have yet to behold what this humble idea begot in its most recent incarnation: the programmable piano, otherwise known as the "punch-card piano". The self-playing programmable piano is different from most Minecraft music machines in that you only need to change a series of blocks to create an entirely different set of music—no redstone rewiring needed. That's why we chose the programmable piano for last friday's Minecraft World Weekly Workshop!
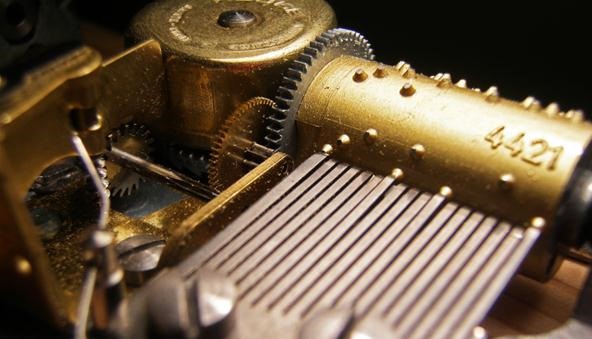
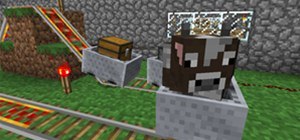
The punch-card prototype is just like its real world equivalent—you know, those little toy music boxes that play short metallic tunes when cranked.
In the real world music box, little metal prongs tuned to a musical scale run over a metal cylinder with little bumps and when each bumps hits a metal prong, a note plays. And with a series of notes what do you get? Music!
The Minecraft music box runs on redstone, so when a glass block comes into contact with a redstone current, nothing plays, but when any non-glass block touches a redstone, you get a note and with a series of notes, you get music.
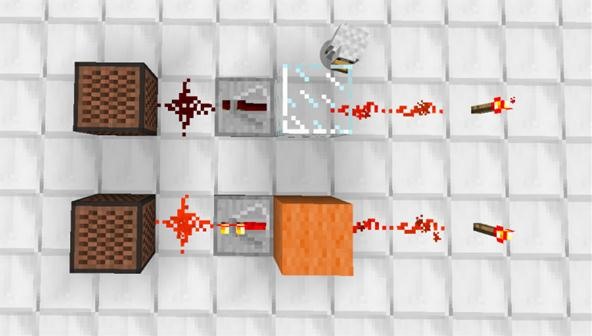
Ignore the chicken.
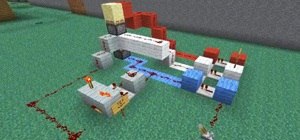
The punch card piano relies on two fundamental ingredients: the transistor concept above, and a timed redstone pulser for piecing the music together in uniform timing.
There are a few kinds of redstone pulsers and several ways to generate a pulse, but to build the punch-card unit we will need the most accurate pulses possible. For that, you will need to create a delayed-piston circuit.
Step 1 Create a Delayed Piston
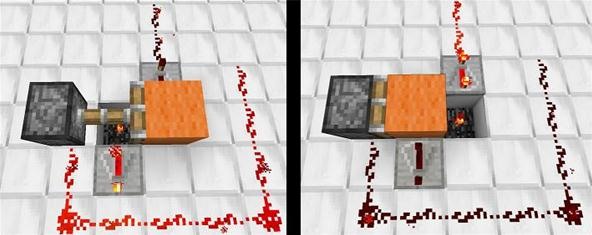
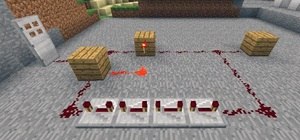
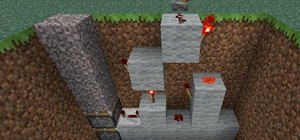
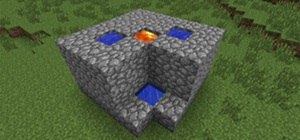
To create a basic delayed piston circuit, place a sticky piston facing any horizontal direction and dig out a block in front of the piston, placing a redstone torch in the hole. Place a redstone repeater in position to receive power from the redstone torch, and run redstone from the repeater to the piston as seen below.
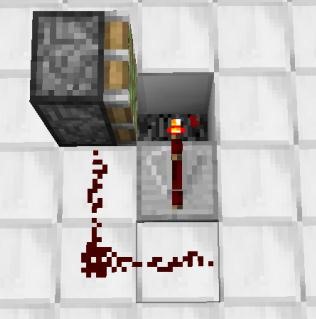
The circuit is not complete yet, but why? Remember the transistor concept? To complete the circuit, place any non-glass block on the piston. The block will carry current from the torch to the piston, and back to the torch again. The piston will immediately begin moving back and forth in a self-contained unit.
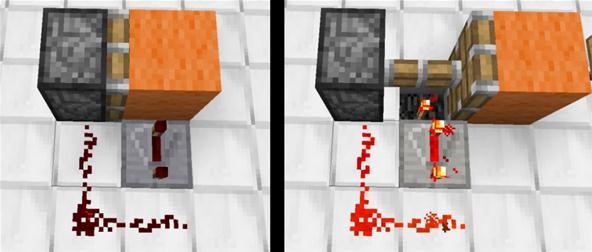
You can generate two pulses from this unit by removing another block adjacent to the current hole, adding redstone to it, and putting another repeater in place to receive power from the piston when it is extended.
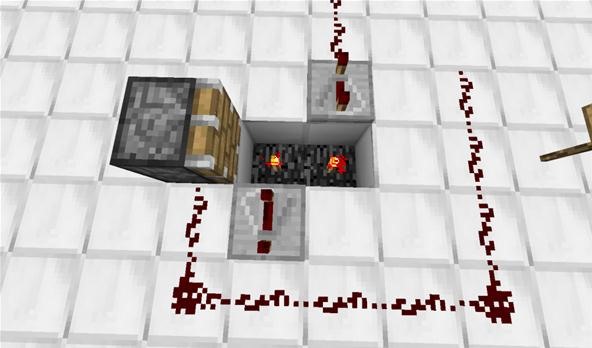
Now when you place a block in the piston, you will generate two pulses in time with each other like so. To change the timing, simply left click the repeaters, but make sure their settings are equal.
There you have it: the basic delayed piston circuit. To get to the programmable piano, however, we will need something more complicated. We will need a delayed piston circuit with four outputs, each generating a pulse one at a time. To generate four outputs we will need more pistons, but fear not—the concept is the same.
Step 2 Create a Delayed Piston Circuit with 4 Outputs
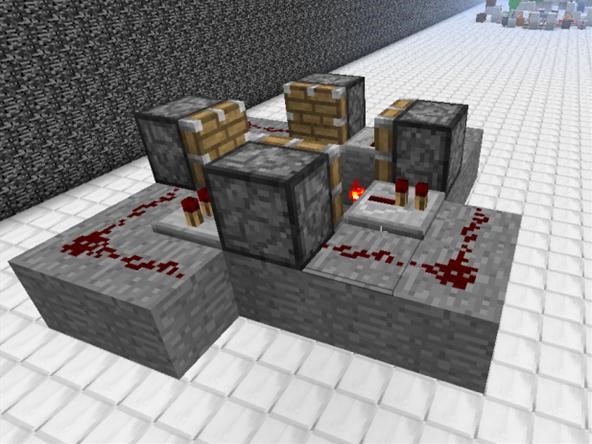
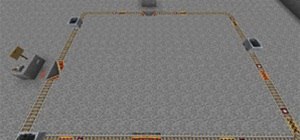
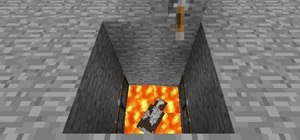
To create a delayed piston circuit with four outputs, dig a hole one block deep and 4x4 blocks wide. In it, place four redstone torches. Place four regular (non-sticky) pistons on each side of the hole, each facing the center. Next to them, place four repeaters so that they receive power from the torches. Finish it off by running redstone wire from each repeater to each piston; it will look like you are linking the pistons together.
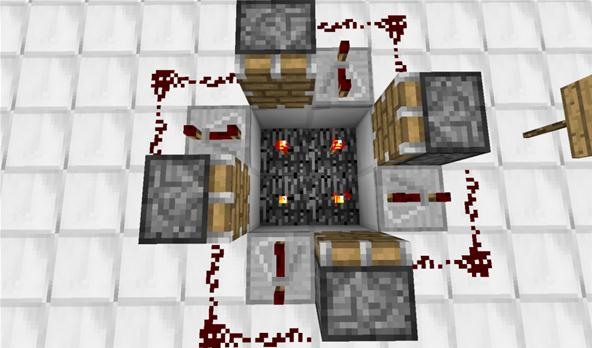
Your circuit should look like what we have above. Now complete the circuit by placing a non-glass block in one of the pistons and there you have it. Remember: you can adjust the speed the pistons moved by left-clicking the repeaters.
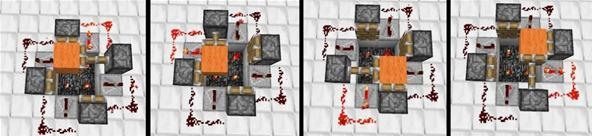
Power should travel through the redstone wire as the block is placed between pistons, as seen above. From each of those L-shaped redstone connections, we will run wire which will program our punch card machine. Four pistons: four pulses.
Now let's take the engine of our programmable piano and place it in the machine.
Step 3 Understand How the Programmable Piano Works
Let's start with an overview of how the Programmable Piano works. The punch card piano is comprised of three main parts: the pulser, the sheet music, and the music blocks. Let's take a closer look:

Now that you have an understanding for how the punch card piano works, lets get begin detailing the process. Keep in mind that this is only one way to build the punch card piano. Once you understand how the machine functions, it is possible to build music boxes of endless variation.
Now, let's go over the steps necessary for creating your own punch card piano.
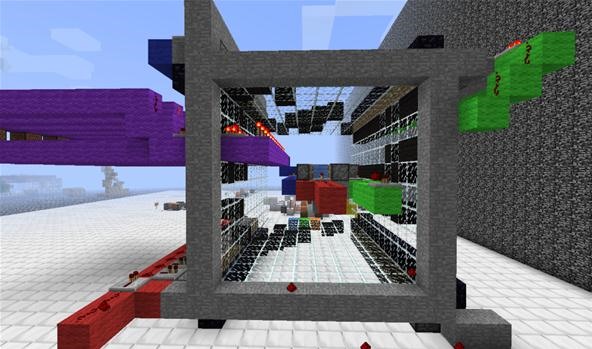
Step 4 Placing the Delay Pulser
Build a piston delay pulser following the steps provided earlier. This will fit in the center of your machine so be sure that it is about four to five blocks off the ground. Left click your repeaters until they are at their widest (slowest) setting for best results.
Step 5 Frame Your Piano with Pistons and Repeaters
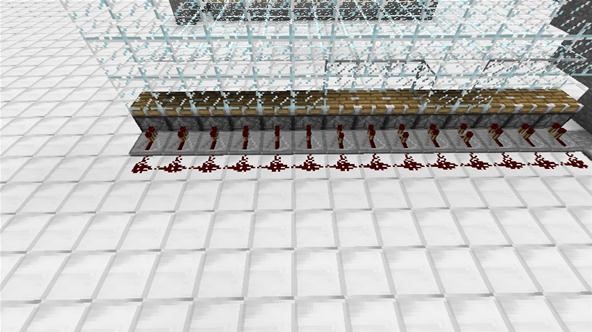
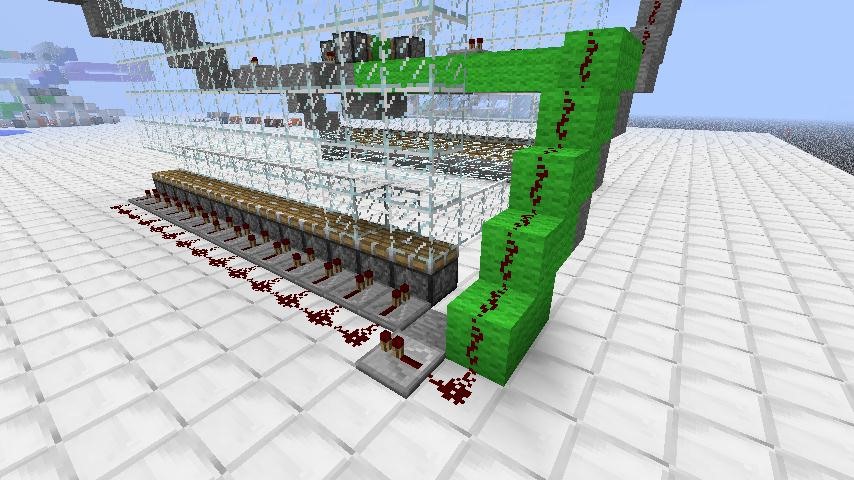
Now it's time to begin framing the piano. We will lay out pistons on the ground below the pulser to begin framing the machine. Start by placing a row of pistons fourteen across. Place these pistons facing UP.
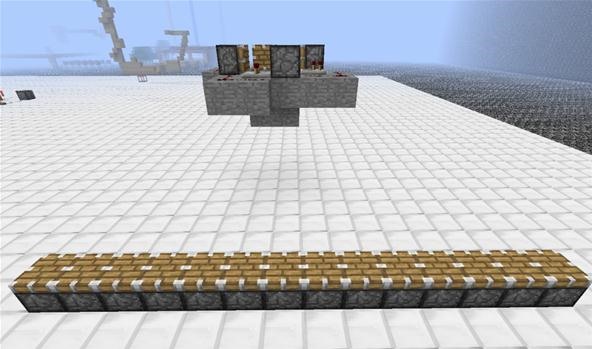
Begin placing redstone repeaters next to the pistons. Make sure they are in place to receive power from outside of the pistons. Continue by stringing them together with redstone wire.
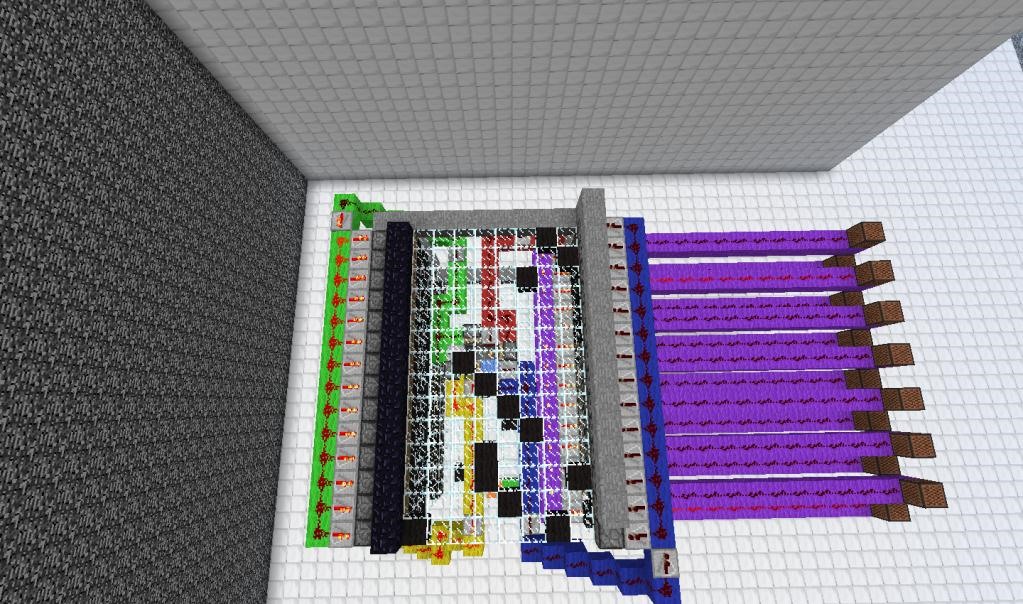
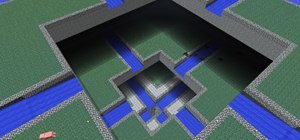
Remember that the rows of pistons will have to move the music in a rotating square, each facing a different direction so as to facilitate movement. Continue by placing pistons with their respective repeaters and redstone wire. It may help to add the glass music sheet as you go along. Remember that the sheet music is 9 blocks wide and 14 blocks long.
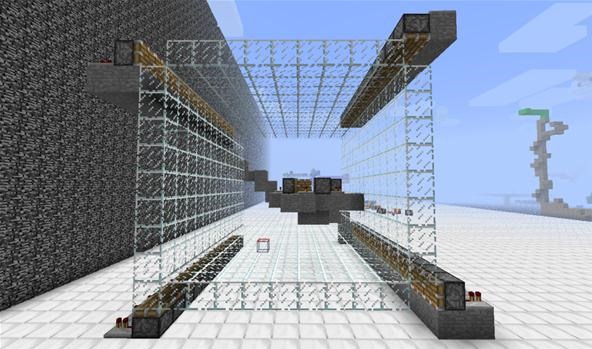
You should end up with a set-up similar to this. Imagine the sheet music being pushed up the bottom left pistons, right by the top left pistons, down by the top right pistons, and left by the bottom right pistons.
Step 6 Connect the Machine
Now it's time to connect everything. Run blocks from each of the redstone connections attached to your piston pusler. You should have four pathways running from each connection to each row of pistons.
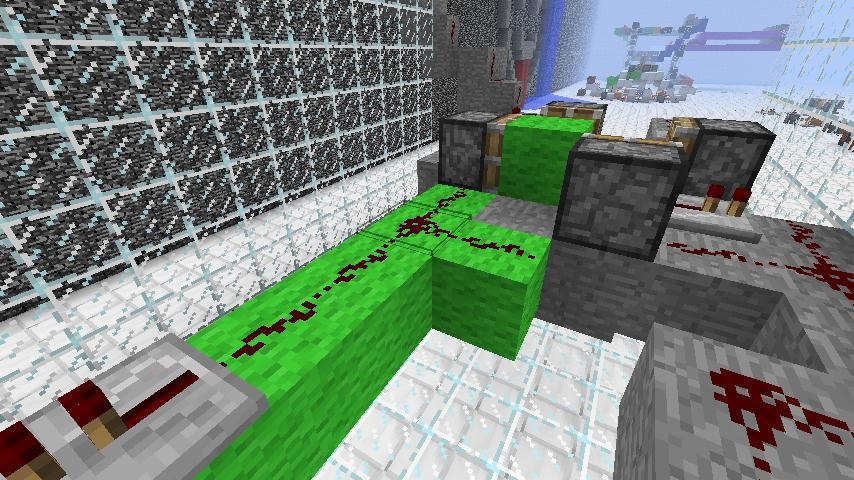
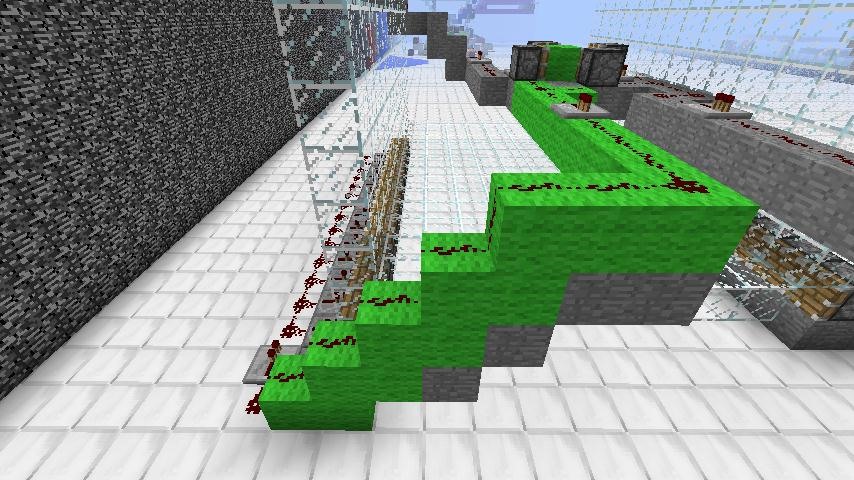
Do this again three times and your machine is nearly there! Remember to keep the repeaters touching your piston rows at their default timing.
Step 7 Add the Music Blocks
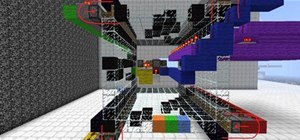
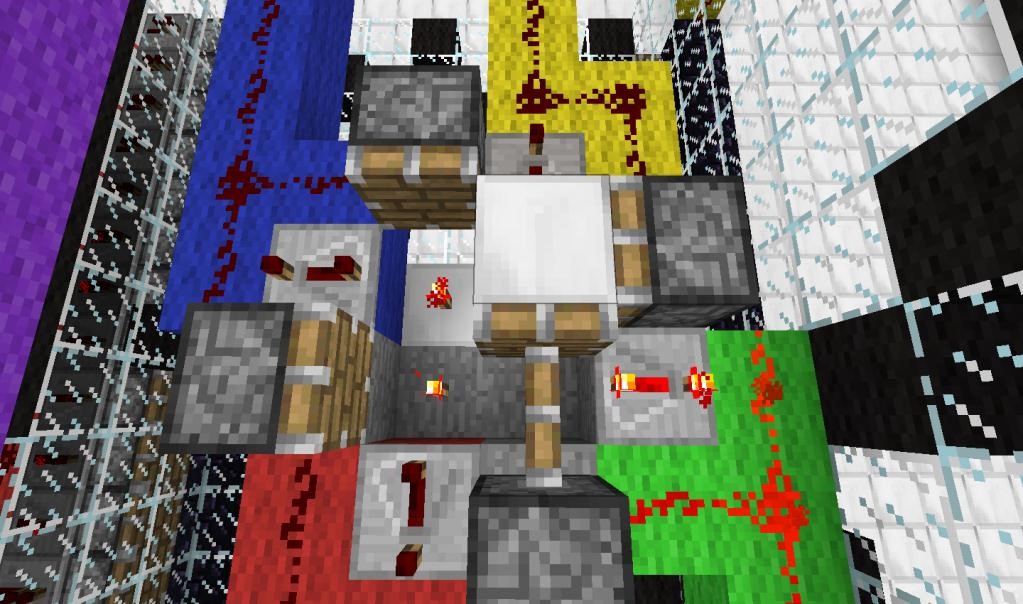
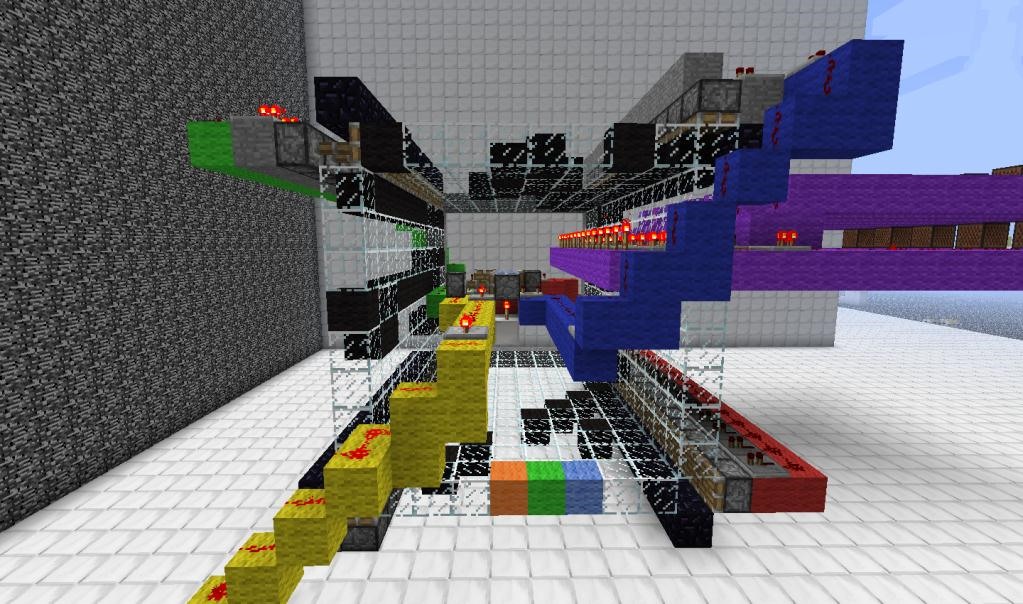
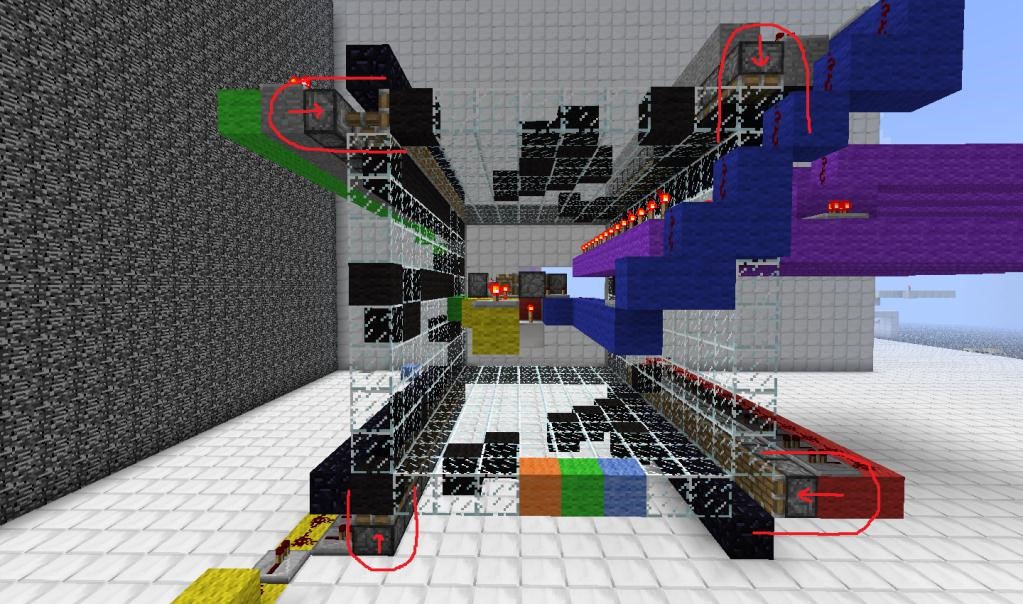
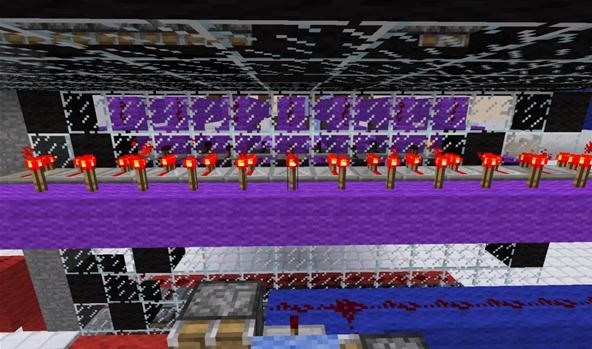
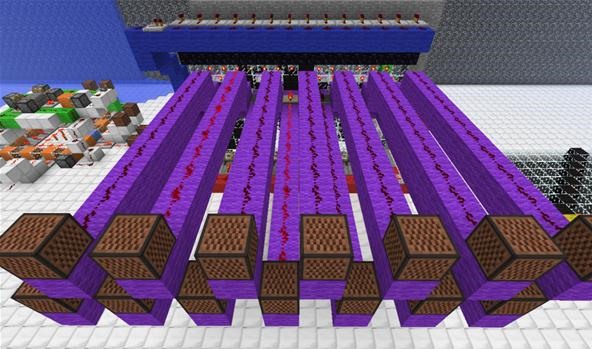
Here is the same machine all dolled up and completed. From this side view, you can see a long row of purple wool on top, which are redstone torches powering repeaters. These lead to long purple pathways with redstone wire which power the music block. In between the repeaters and music boxes is the sheet music.
Here is a close up of the row for better detail.
As you can see, when the glass blocks of the sheet music passes, the redstone doesn't light up, but when a wool block passes, the redstone is powered on leading to the music blocks which play a note.
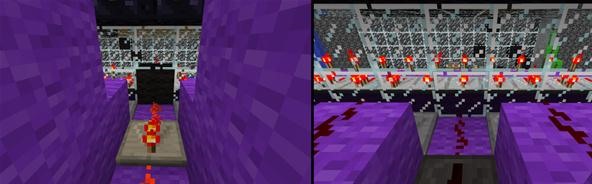
Below you can see a larger view of the music blocks being played by the moving music sheet.
Where you place the music boxes is up to you, just be sure to use a similar design so that the music sheet passes between the repeaters and the music blocks. We've placed ours far away so you can hear the music blocks far from the reach of those noisy pistons.
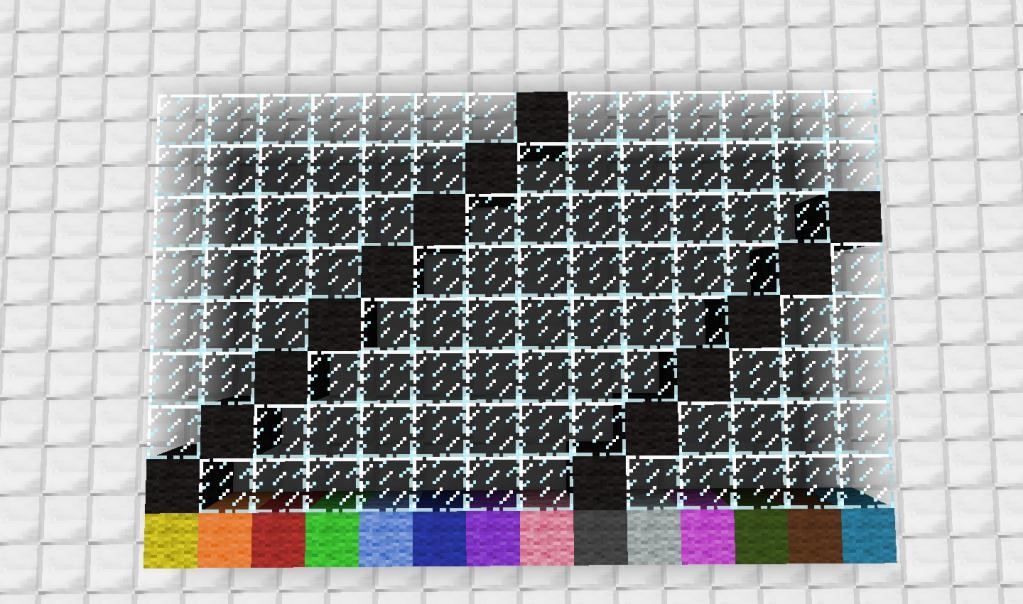
Step 8 Program Your Music Sheet!
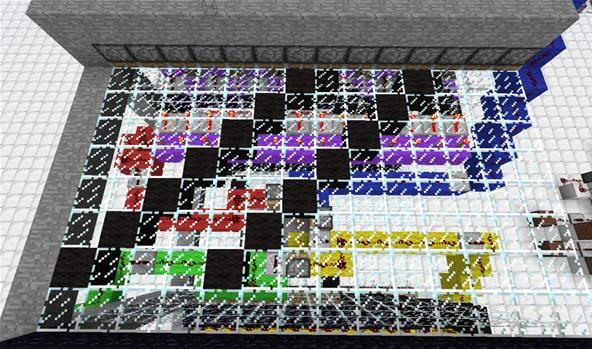
Now place wool on your music sheet where you want the blocks to play and keep glass where you want pauses or breaks. Keep in mind that you can tune your music blocks by left clicking them.
As stated earlier, there are many applications and variations of this build, but for our purposes it is complete. I hope you've learned how a simple innovation like the block transistor can spark so much progress, even in something as humble as Minecraft.
Please be patient with this build and keep in mind that it takes time. There is a lot that needs to be planned out, and a lot to understand in order to be successful, but there's nothing a little tinkering can't fix. If you have any questions please feel free to leave a comment, send me a message, post in the forums, or come onto the server and see these machines in their full operation!
Special thanks to Nightdusk and LongQuan for their help.
Follow us on twitter @MinecraftHowTo
Music box photo by EllynArt
Just updated your iPhone? You'll find new emoji, enhanced security, podcast transcripts, Apple Cash virtual numbers, and other useful features. There are even new additions hidden within Safari. Find out what's new and changed on your iPhone with the iOS 17.4 update.


1 Comment
can you do a skyveiw of the final picture in step 5??
Share Your Thoughts