
Since its creation, Arduino has been growing exponentially more popular as DIY enthusiasts and Makers alike realize its potential. As new versions of the device are released, many easy-to-use peripherals are showing up on the market also.
One of the more important features of technology is communication, be it wired or wireless. Bluetooth and WiFi are two common names most technically literate individuals could identify with, due to their global adaptation into consumer electronics. By using Arduino, we are able to dig into the bare-bones of this technology; using it for simple hardware-to-user communication.
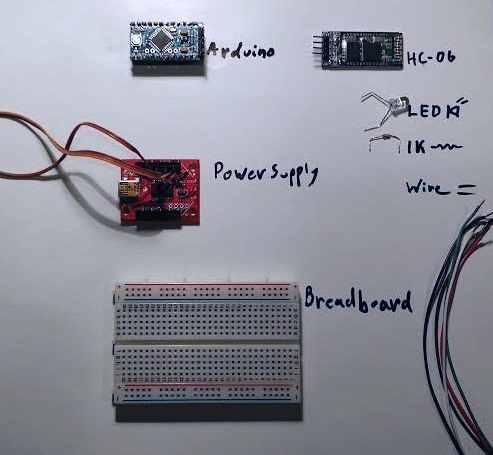
Parts List:
- An Arduino (your choice, there are many versions)
- An LED
- 1K resistor
- Some jumper wires
- Breadboard
- Bluetooth module (I used the HC-06)
- 5 volt power supply
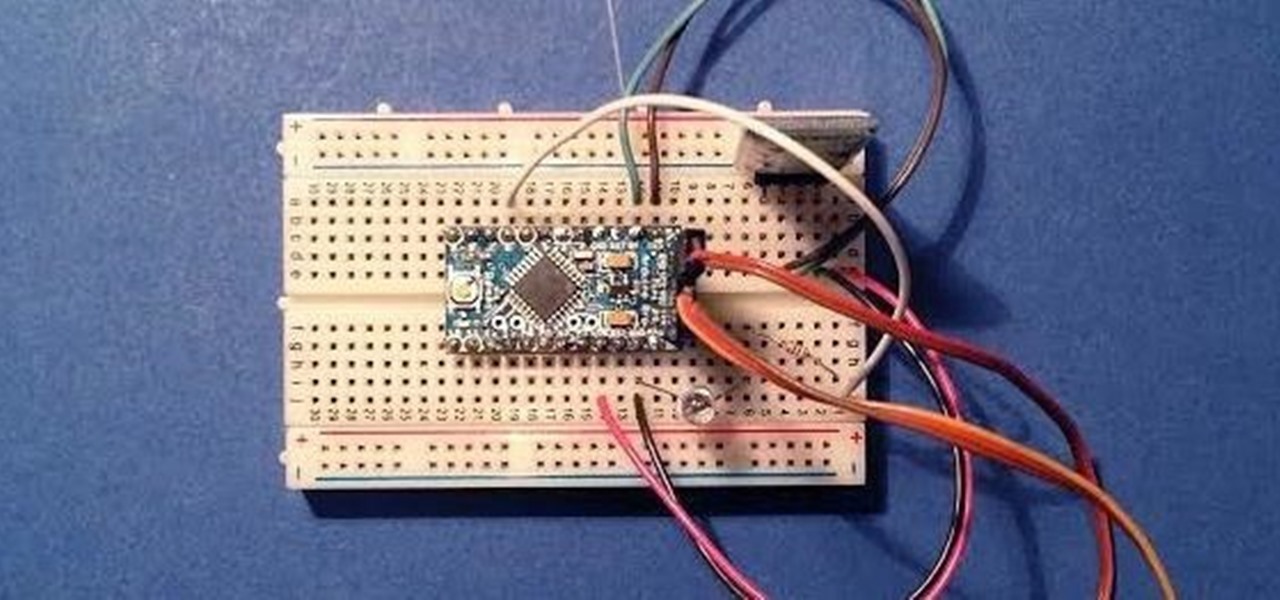
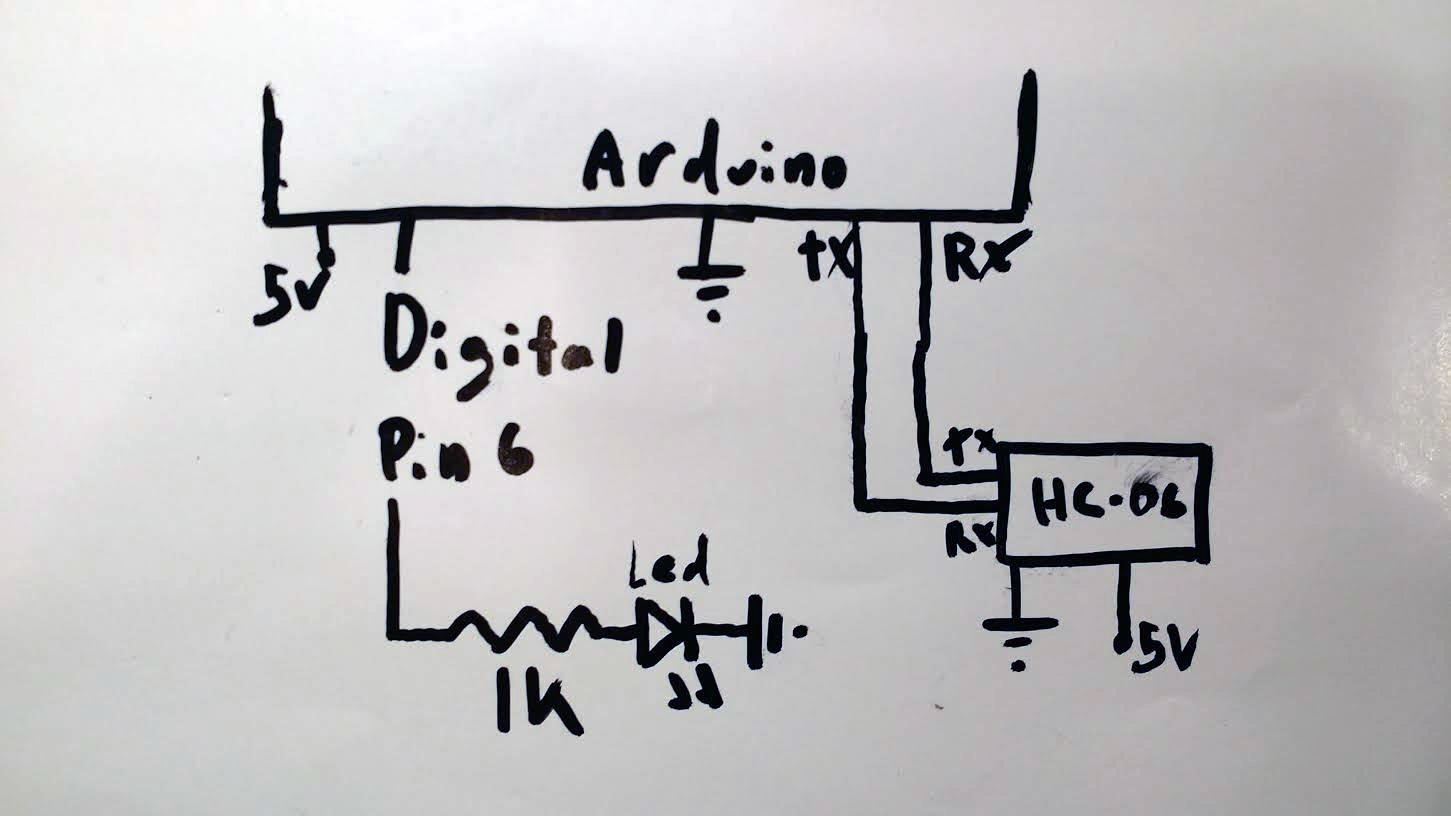
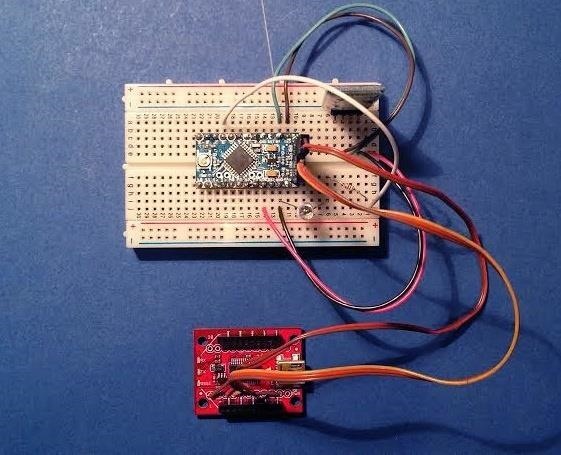
The Wiring:
Take a look at the circuit diagram below. Yours doesn't have to be exact, just ensure there are no shorts or polarity issues.
The Code:
The code used was based on the Blink sketch from the Arduino examples collection, with the exception of pin 6 rather than 13. Feel free to vary and add your own modifications; Arduino will notify you if there are syntax errors.
If you're a little unfamiliar with Arduino code, take a look at my article on Arduino Basics.
int led = 6;
// the setup routine runs once when you press reset:
void setup() {
// initialize the digital pin as an output.
Serial.begin(9600); //initialize serial communication to 9600 baud
pinMode(led, OUTPUT);
}
void loop() { // the loop routine runs over and over again forever
if (Serial.available()) { //wait until something is received before initialization
digitalWrite(led, HIGH);
Serial.println("on"); // turn the LED on then send serial message
delay(1000); // wait for a second
digitalWrite(led, LOW);
Serial.println("off"); // turn the LED off then send serial message
delay(1000); // wait for a second
}
}
Communication:
Technically, the majority will be the Arduino sending information. However, in order to initialize this, you must first send something. I used my Android smartphone to create a Bluetooth link, using an app called Bluetooth Terminal (on the Play Store).
The password for the HC-06 should be "1234", though some modules have different pairing passwords. Once a link is established, the red LED on the HC-06 should stop blinking and become solid. Now, by sending something to the Arduino, you will initialize the Blink loop and the state of the LED should show up in the terminal.
As Always...
Be safe with yourself and fragile electronics, don't burn yourself on soldering equipment, and remember that straight wall-power isn't a friendly power source for Arduino.
If you enjoy filling your weekends with entertaining Maker-style projects, take a look at my other articles, such as Building Your Own High-Powered Rocket Gun, Making Electromagnetic Weapons, and Shocking People with Your Fingertips.
Just updated your iPhone? You'll find new emoji, enhanced security, podcast transcripts, Apple Cash virtual numbers, and other useful features. There are even new additions hidden within Safari. Find out what's new and changed on your iPhone with the iOS 17.4 update.


Be the First to Comment
Share Your Thoughts